How to Make Your Instagram Account Private
Making an Instagram account private takes one setting:
- Open Account privacy in your settings and turn on Private account.
- Only people you approve can then see your photos and videos; your name, username, photo and bio stay visible to everyone.
- The same Account privacy screen is where you’d revisit this setting later.
Making an Instagram account private is a single toggle, but the details around it — what stays visible to visitors and approved followers, why professional accounts can’t use it, and how to reverse it — are where most guides get vague. This piece works through Meta’s own documentation for the Account privacy setting and the audience boundary it creates, plus the separate step required if you run a Business or Creator account. The goal is a procedure you can act on right away, not a description of where to go looking for one.
On this page
Turn on Private Account in Instagram settings
Instagram’s account-wide privacy control is a setting Meta documents as Account Privacy, built around a Private account toggle. In Meta’s own help procedure, switching it on is confirmed with Switch to private — that’s the documented confirmation step, though the exact menu path can look different depending on your app version, device and account type. Open your settings and look for Account privacy; if your screen doesn’t match a walkthrough you’ve seen elsewhere, search “account privacy” inside your settings rather than assuming the option moved or disappeared.
This toggle controls your account’s photos and videos — a broader scope than tools like Close Friends or message-request settings, which are covered further down and only affect one Story or one type of interaction.
What people can see after you go private
Once your account is private, only people you approve can follow you, and approved followers can see your photos and videos on your profile or in their feed. A private account isn’t anonymous — your profile photo, name, username and bio stay visible to anyone on or off Instagram. What changes is who can see your photos and videos, not whether your profile itself is discoverable.
| Who’s looking | Profile info (photo, name, username, bio) | Photos & videos |
|---|---|---|
| Anyone who hasn’t been approved to follow you | Visible | Not visible |
| People you’ve approved as followers | Visible | Visible on your profile and in their feed |
Going private also pulls your content out of the discovery surfaces where strangers might stumble onto it without following you: your photos and videos stop appearing in Search, Explore, hashtag pages and location pages. That’s separate from the approval requirement — one setting decides who sees your content, the other decides where Instagram surfaces it to people who weren’t looking for you specifically.
Make your account public again
Account privacy is the same setting that controls this, so that’s what to open if you want to switch back. Meta’s documentation confirms the wording for switching to private — Switch to private — but doesn’t publish matching confirmation wording for reversing it, so check your app directly rather than expecting an identical prompt. If you’re unsure whether the change took effect, reopen Account privacy and confirm the toggle’s current position; that’s the only reliable check.
Professional, creator, and business account limits
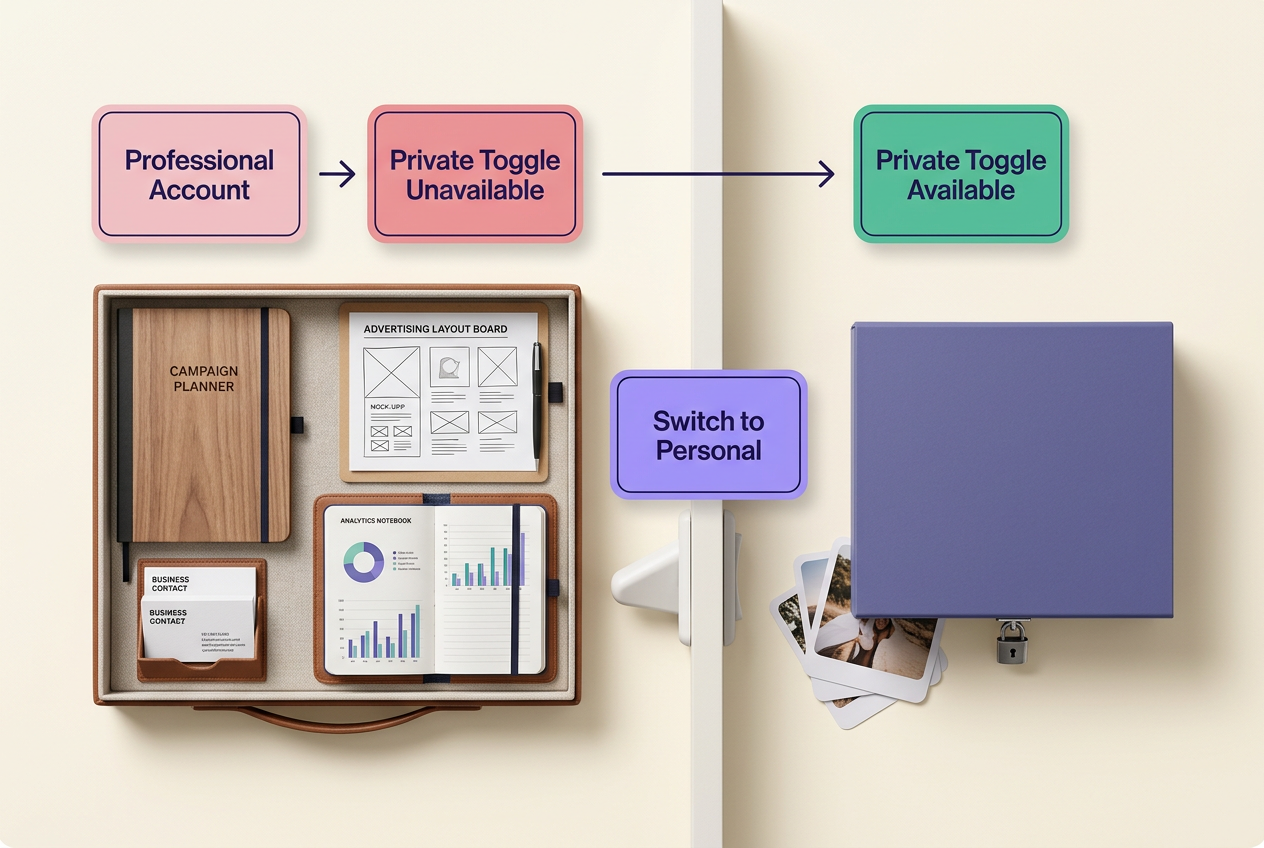
Looking for a Private account toggle on a Business or Creator account is the wrong move — professional accounts can’t be set to private. That restriction applies to both Business and Creator account types, not just one of them, so switching between the two won’t unlock the setting.
If privacy matters more to you than the tools that come with a professional account, Meta’s documented route back to personal runs through your profile menu: Account type and tools, then Account type, then Switch account type, then Switch to personal account, confirmed with Switch to personal. Meta warns that this removes access to some business tools, including Meta Business Suite and Meta Ads Manager — converting doesn’t turn on privacy by itself, it clears the restriction so the Account privacy toggle becomes available afterward.
The practical decision is straightforward: keep the professional account and lean on narrower controls — Close Friends, message requests, tag and mention settings — if you still need Meta Business Suite or Ads Manager. Convert to personal first only if privacy outweighs those tools, since an account can’t hold both statuses at once.
Use a narrower privacy control when that is all you need
Account-wide privacy isn’t the only option, and it’s often more than the situation calls for. Meta documents three narrower controls that solve specific problems without locking down your whole profile:
- Sharing one Story with a smaller group — use your Close Friends list, which only affects that Story, not your account.
- Stopping unwanted tags or mentions — use the mention and tag settings, which control interactions, not who sees your posts.
- Managing who can message you — use message request settings, which route requests to Message Requests, or stop you from receiving them at all, until you accept them into Chats.
None of these substitute for a private account — each one narrows a single interaction or piece of content, not your overall visibility. If the goal is controlling who sees your profile and posts broadly, the Account privacy setting covered above is still the right tool.
Quick privacy check before you leave
Before you close settings, confirm the Private account toggle actually shows as on — open Account privacy again if you’re not sure, since that’s the single control this entire guide describes. If your goal was narrower than full account privacy — hiding one Story, filtering messages, blocking a tag — the controls in the section above solve that without touching this toggle at all.
No method guarantees a specific number of followers, views, or income. Results depend on niche, content quality, and account history.
 120,000+ creators say yes
 Real Active Accounts


 Username Generator
  Hashtag Generator
  Font Generator